Revamp Your Scindapsus Pictus: Master the Art of Repotting Satin Pothos
Hey there! Ready to give your Scindapsus Pictus, or Satin Pothos, a fresh start? In this article, I'll guide you through the art of repotting to ensure your plant's health and vitality.

Hey there! Ready to give your Scindapsus Pictus, or Satin Pothos, a fresh start? In this article, I'll guide you through the art of repotting to ensure your plant's health and vitality.

Repotting is crucial for houseplant care, allowing them to thrive and reach their full potential. I'll cover the best time and frequency for repotting, pot selection, soil mix preparation, and the repotting process itself.
Plus, I'll share aftercare and maintenance tips. Let's master the art of repotting Satin Pothos together!
Best Time and Frequency for Repotting
I typically recommend repotting your Scindapsus Pictus, or Satin Pothos, every 3-5 years for optimal growth. Knowing the best time and frequency for repotting is crucial to keep your plant healthy.
Spring and summer are the ideal seasons for repotting, but in warmer winter climates, early fall is also suitable. Signs that a plant needs repotting include longer trails and extensive roots.
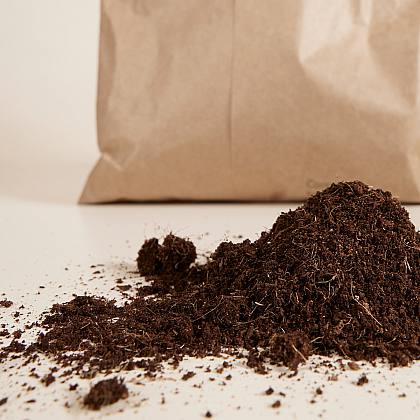
When choosing the right potting mix, opt for a rich, organic potting mix that provides good drainage. Avoid using garden soil, as it can be too heavy for houseplants. Look for potting mixes formulated specifically for houseplants, and consider adding compost or organic matter to improve soil fertility.
Pot Selection and Preparation
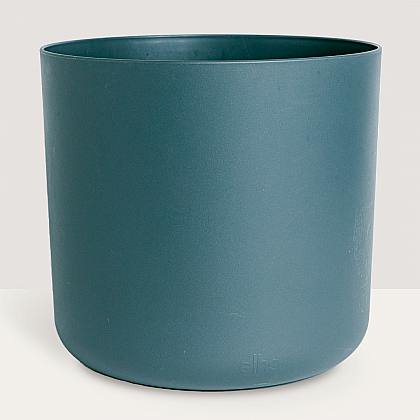
When selecting a pot for your Scindapsus Pictus, it's important to choose one that's slightly larger than the current pot and has proper drainage holes for excess water to escape. Choosing the right pot size, materials, and style is crucial for the health and growth of your plant.
Opt for a pot that provides enough space for the roots to expand and grow. Clay or ceramic pots are recommended as they allow for better airflow. Ensure the new pot has drainage holes to prevent water from pooling and causing root rot.
Additionally, using a pot with a saucer can help catch excess water. By ensuring proper drainage in the new pot, you're creating a favorable environment for your Scindapsus Pictus to thrive.
Soil Mix and Preparation
To ensure optimal growth and health for your Scindapsus Pictus, it is essential to carefully select and prepare the right soil mix. Choosing the right potting mix and ensuring good drainage are crucial factors for the overall well-being of your plant. A rich, organic potting mix that provides good drainage is recommended. Avoid using heavy garden soil, as it can lead to root rot. Look for potting mixes formulated specifically for houseplants, or create a mix of potting soil, coco chips, pumice, and coco fiber to mimic the plant's natural environment. A well-draining potting mix, such as a mixture of peat moss, perlite, and vermiculite, with a slightly acidic pH of 6.0-6.5, is ideal. Adding compost or organic matter can improve soil fertility and support healthy growth. Remember, the right soil mix is essential for the success of your Scindapsus Pictus.
| Choosing the right potting mix | Importance of good drainage |
|---|---|
| A rich, organic potting mix that provides good drainage is recommended. | Avoid using heavy garden soil, as it can lead to root rot. |
| Look for potting mixes formulated specifically for houseplants. | A well-draining potting mix, such as a mixture of peat moss, perlite, and vermiculite, with a slightly acidic pH of 6.0-6.5, is ideal. |
| Create a mix of potting soil, coco chips, pumice, and coco fiber to mimic the plant's natural environment. | Adding compost or organic matter can improve soil fertility and support healthy growth. |
Repotting Process
When it comes to repotting your Scindapsus Pictus, there are a few important steps to follow.
First, choosing the right pot size is crucial. Opt for a pot that's one size larger than the current one, ensuring it has drainage holes for excess water to escape.
Clay or ceramic pots are recommended for better airflow.
As for tools, you'll need a few essentials for a successful repotting. These include a trowel or hand shovel for scooping soil, pruning shears for trimming any overgrown roots, and a watering can or spray bottle for watering the plant after repotting.
Watering and Settling-in Period
During the watering and settling-in period after repotting my Scindapsus Pictus, I make sure to thoroughly water the plant to help the soil settle. Watering techniques are crucial during this time to ensure the plant's health and proper growth.
I water the plant until the water drains out from the bottom of the pot, ensuring that the soil is evenly moist. It's important to avoid overwatering, as this can lead to root rot and other issues. Signs of overwatering include yellowing leaves, wilting, and a sour smell coming from the soil.
To prevent overwatering, I wait until the top inch of soil is dry before watering again. By following these watering techniques and being mindful of the signs of overwatering, I can ensure that my Scindapsus Pictus thrives in its new pot.
Removing the Plant From the Current Pot
When repotting my Scindapsus Pictus, I gently remove the plant from its current pot, being careful not to damage the roots. This step is crucial for plant preservation and preventing root damage. Here's how I do it:
- First, I water the plant a couple of days before repotting to ensure the soil is slightly moist.
- Next, I carefully loosen the root ball from the current pot by gently squeezing the sides of the pot and tapping the bottom.
- Once the root ball is loose, I hold the plant at the base and gently lift it out of the pot, supporting the stems with my other hand.
- As I remove the plant, I shake off any excess soil to expose the root system.
- Finally, I place a layer of fresh potting mix at the bottom of the new pot and carefully position the plant in the center, filling the remaining space with potting mix.
Placing the Plant in the New Pot
To place the plant in the new pot, I carefully position it in the center and fill the remaining space with potting mix.
Choosing the right pot size is crucial for the health and growth of the satin pothos. It's recommended to select a pot that's one size larger than the current pot to provide enough space for the roots to grow. Ensure that the new pot has drainage holes to allow excess water to drain out.
Properly filling the new pot with soil mix is essential for providing the necessary nutrients and support for the plant. Use a rich, organic potting mix that provides good drainage. Fill the pot with the appropriate amount of soil mix, making sure to position the plant in the center. Fill the remaining space with potting mix, gently pressing it down to secure the plant.
Aftercare and Maintenance
After placing the plant in the new pot and ensuring proper soil filling, it's important to focus on the aftercare and maintenance to ensure the health and thriving growth of the satin pothos. Here are some key steps to follow:
Monitoring Humidity Levels:
Satin pothos enjoys high humidity levels, so it's important to monitor and maintain the humidity around the plant.
Use a hygrometer to measure the humidity level in the air.
Increase humidity by misting the plant regularly or placing it on a tray filled with water and pebbles.
Preventing Pests:
Regularly inspect the plant for any signs of pests, such as mealybugs or spider mites.
If pests are spotted, isolate the plant and treat it with an appropriate insecticide or natural pest control method.
Keep the plant clean by regularly wiping the leaves with a damp cloth to remove dust and debris.
Providing the Right Light and Fertilization
I recommend placing the satin pothos in a location with bright, indirect light to ensure proper growth and health. This plant thrives in moderate to bright light conditions, but direct sunlight should be avoided as it can scorch the leaves.
It's important to choose the right container for your satin pothos, ensuring it has proper drainage holes to prevent waterlogging. Adjusting the watering schedule is crucial as overwatering can lead to root rot. Allow the top inch of soil to dry out before watering again.
Fertilization is also essential for the overall health of the plant. Use a balanced, water-soluble fertilizer every 2-4 weeks during the growing season. This will provide the necessary nutrients for optimal growth and vibrant foliage.
In conclusion, by following the steps outlined in this article, you can successfully repot your Satin Pothos and give it a fresh start. Remember to choose the right time and frequency for repotting, select a suitable pot, prepare the soil mix, and follow the repotting process carefully.
Afterward, provide the plant with proper aftercare and maintenance, including the right light and fertilization. With these expert tips, your Scindapsus Pictus will thrive and create a stunning display in your home.