Revive Your Spider Plant: The Ultimate Repotting Guide
As a plant enthusiast, I know the importance of giving my spider plants proper care. They bring life to any space, but they need attention to thrive.

As a plant enthusiast, I know the importance of giving my spider plants proper care. They bring life to any space, but they need attention to thrive.

Repotting is a crucial part of their care. In this ultimate repotting guide, I'll show you the signs your spider plant needs repotting, how to choose the right pot, the process of repotting, and aftercare tips.
Whether you're a novice or experienced plant parent, this guide will help you revive your spider plant and let it thrive. Let's dive in and give our spider plants the love they deserve!
Signs of Repotting Need
When the leaves of your spider plant start to yellow or brown, it's a clear sign that it's in need of repotting. This happens because the plant has outgrown its current pot, and its roots are becoming cramped.
It's important to repot spider plants at the right time to ensure their health and growth. Common mistakes to avoid while repotting spider plants include choosing the wrong pot size, neglecting drainage holes, and using the wrong type of pot material.
It's crucial to select a pot slightly larger than the current one and provide good drainage to prevent waterlogging. Plastic or ceramic pots are preferred over metal ones. Additionally, be careful not to damage the roots while removing the plant from its current pot, and use fresh soil when repotting.
Importance of Repotting
Repotting my spider plant is essential to ensure its healthy growth and vitality. There are numerous benefits of repotting, including providing more space for the plant's roots to grow and preventing it from becoming root-bound. Repotting also offers the opportunity to refresh the soil and provide essential nutrients for the plant's well-being. Another advantage is improved drainage, which helps prevent waterlogging and promotes healthier root development.
However, there are common mistakes to avoid during the repotting process. It's crucial to choose the right pot size, ensuring it's slightly larger than the current one but not too big. Additionally, using a pot with drainage holes and suitable stability is important. When repotting, gently loosen the roots and remove any dead or damaged ones.

After repotting, place the spider plant in a bright, indirect light location and water it thoroughly. By following these steps, the spider plant can thrive and continue to beautify your space.
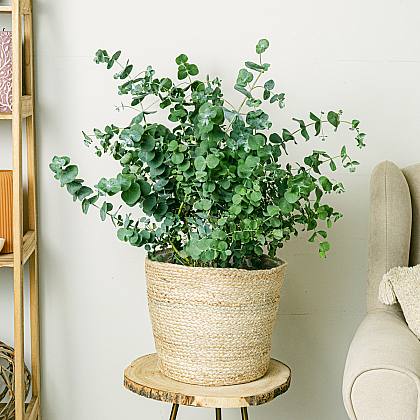
Choosing the Right Pot
To ensure the successful repotting of my spider plant, I need to carefully select the right pot. Here are the key factors to consider when choosing the pot:
Size: Select a pot that's slightly larger than the current one to provide enough space for the plant's roots to grow.
Drainage: Ensure the pot has drainage holes to prevent waterlogging and promote better drainage.
Material and Stability: Consider using a plastic or ceramic pot rather than a metal one. Look for a pot that has good stability to prevent tipping over.
In addition to choosing the right pot, it's equally important to select the right soil for your spider plant. A well-draining potting mix suitable for spider plants will provide the necessary nutrients and moisture balance for optimal growth.
Repotting Process
Now, let's delve into the process of repotting my spider plant and give it the fresh start it deserves.
When repotting your spider plant, it's important to avoid common repotting mistakes that can hinder its growth. One common mistake is choosing a pot that's too large, as this can lead to overwatering and root rot. Another mistake isn't loosening the roots before transferring the plant to the new pot, which can restrict its growth. Additionally, using poor-quality soil or not providing adequate drainage can result in waterlogged roots and poor plant health.
To avoid these problems, gently remove the spider plant from its current pot, loosen the roots, and place it in a slightly larger pot with fresh, well-draining soil. Remember to water the plant thoroughly after repotting to ensure proper hydration.
Aftercare and Maintenance
After repotting my spider plant, I ensure its healthy growth and longevity through proper aftercare and maintenance. This involves taking preventive measures to avoid root rot and dealing with common pests. Here are three important steps to follow:
- Preventing root rot:
- Avoid overwatering the plant and ensure proper drainage in the pot.
- Use a well-draining potting mix and avoid compacting the soil.
- Allow the top inch of the soil to dry out before watering again.
- Dealing with common pests:
- Keep an eye out for pests like spider mites, aphids, and mealybugs.
- Regularly inspect the leaves and stems for any signs of infestation.
- Treat infestations with insecticidal soap or neem oil, following the instructions on the product.
Best Time for Repotting
In the article 'Revive Your Spider Plant: The Ultimate Repotting Guide', the best time for repotting a spider plant is during the spring and summer months. Repotting frequency for spider plants is typically every 1-2 years, or when signs of rootboundness become evident.
It's important to avoid repotting during the winter, as this is a time for houseplants to rest and not actively grow. Common mistakes in repotting include using a pot that's too large, which can lead to overwatering and root rot, and failing to provide proper drainage, resulting in waterlogging.
Another mistake isn't loosening the roots before placing the plant in the new pot, which can hinder root growth. By following the recommended repotting schedule and avoiding these common mistakes, you can ensure the health and vitality of your spider plant.
Spider Plant Fact 1
To further explore the fascinating world of spider plants, let's delve into an intriguing fact: how do potbound plants affect their water retention capabilities?
Spider Plant Fact 1: Potbound plants don't hold as much water.
- When a spider plant becomes potbound, its root system becomes tightly packed within the pot.
- This compacted root system restricts the plant's ability to absorb water effectively.
- As a result, potbound spider plants may struggle to retain enough moisture, leading to quicker soil drying and potential water stress for the plant.
Understanding this fact is crucial when it comes to repotting spider plants. By providing them with a larger pot and fresh soil, you can help improve their water retention capabilities and overall health.
Spider Plant Fact 2
During the process of repotting, it's essential to be aware of Spider Plant Fact 2: The root ball of a spider plant can tolerate shaving. This means that if the roots of your spider plant have become densely packed or root-bound, you can remove some of the outer layer of the root ball without harming the plant.
Shaving the root ball helps to stimulate new root growth and allows for better nutrient absorption. It's a common problem with spider plants to become root-bound if they aren't repotted regularly. When the roots become overcrowded, it can lead to stunted growth, yellowing or browning leaves, and waterlogging.
Spider Plant Fact 3
With the right care and attention, spider plants can thrive even in low light conditions. Despite their ability to adapt to various lighting conditions, spider plants still require proper care and maintenance to stay healthy.
Here are some key facts about spider plants that you should know:
- Propagation Methods:
- Spider plants can be propagated through division or by planting the plantlets that grow on long stems.
- Division involves separating the plant into smaller sections and replanting them in separate pots.
- Plantlets, also known as spiderettes, can be cut off from the parent plant and rooted in water or soil.
- Common Spider Plant Pests:
- Spider mites: These tiny pests can cause yellowing leaves, webbing, and stunted growth.
- Mealybugs: These cotton-like insects can infest the plant and cause wilting and leaf distortion.
- Aphids: These small insects can cluster on the undersides of leaves and cause leaf curling and distortion.
In conclusion, by following the steps and tips outlined in this repotting guide, you can give your spider plant the care it needs to thrive.
Repotting at the right time, choosing the appropriate pot, and providing proper aftercare and maintenance will ensure your spider plant reaches its full potential.
Remember, these fascinating plants deserve our love and attention, so let's continue to provide them with the care they deserve.